• Keyboard Shortcuts

    Shortcut keys help provide an easier and quicker method of navigating and executing commands in the computer software.

  • Hardware Tips

    Learn about the latest computer hardware and find out how to diagnose

  • Knowledge Practise questions and answers

    Here you can practise more questions and answers to improve your knowledge on computer

Saturday 2 November 2019

Ping, Echo, Game terms, HELO, ICMP, Latency, LPB, Network terms, Ping of death, Ping pong

Ping may refer to any of the following:

Ping is a utility first developed by Michael Muss in 1983 that is used to verify whether or not a network data packet is capable of being distributed to an address without errors. The ping utility is commonly used to check for network errors.


The image is an example of what happens when a ping is sent. The user would first start by using the ping command to ping the IP address 206.224.150.3. Next, the request is sent over the network hub and router, in this example, to the other computer with this IP address. Once successfully received, the computer replies to the ping with a pong response. The time between these two transmissions is calculated to generate an average response or latency time.
In the example above, we access the Windows command line to use the ping command. 


Then we ping "xxxxx.com" and get four responses from the server. In the above example, each reply has the size of the packet (bytes), the time it took in ms, and the TTL.

If the ping does not reach its destination due to an error or because it is being blocked, the sending computer encounters a request timed out error or shows no received packets.


The ping command output can also be directed to a file instead of the command prompt window. Working with the example ping command above, we could use the following command.


ping xxxxx.com > ping.txt


The command above will output the results of pinging xxxx.com to a file named ping.txt. The file will be created in the directory where the ping command was executed. In the first example above, the directory is c:\cgi-bin\update and this is where the ping.txt file will be created. To change the directory where the output file is created, we can enter a different directory in the ping command itself, as in the example below.
 

ping xxxx.com > c:\output\ping.txt
 

The example command above creates the ping.txt file in the c:\output directory, instead of in the c:\cgi-bin\update directory.

What is ping short for?

Ping is not an acronym or short for anything. It is sometimes thought of as the backronym packet Internet groper. The word "ping" comes from the sound sonar generates when it detects objects under water.


In networked computer gaming, ping is a measurement of the latency of the game's network connection to the server, measured in ms (milliseconds). Low ping, indicating low latency, indicates a good connection, resulting in more responsive gameplay. High ping indicates network congestion or problems with the server, and may result in poor responsiveness, or "lag." For example, a player with a low 50 ms ping is going to have a better gaming experience than a player with a 250 ms ping.

Wednesday 30 October 2019

Top 10 Windows 7 tips | Shift | Windows 7 | learn computer online

Top 10 Windows 7 tips

Windows 7 keyboard shortcuts

 
Use the below Windows 7 keyboard shortcuts to make the most of your Windows 7 experience.


Windows key and the arrow keys 

Pressing the Windows key and Left or Right arrow keys will dock the window your viewing to the left or right side of the screen. Pressing the Windows key and the Up arrow will maximize a window and pressing the Windows key and the Down arrow will resize and then minimize the window.
 

Use Shift:

 To stretch a window vertically, press the Windows key + Shift + the Up arrow. If you have multiple monitors, use the Windows key + Shift + the Left or Right arrow keys to move the window to another monitor.
 

Windows key and plus and minus keysIf you ever need to zoom in or out of what is being displayed on your screen press the Windows key and the + (plus) or - (minus) keys. Pressing the plus zooms in and once zoomed in the minus will zoom out.
 

Clear all background programsIf you are not viewing a window in full screen and have other windows open in the background clear all background open windows by pressing the Windows key + the Home key.


Use the Windows 7 search
 

Find and run anything in Windows by using the Windows 7 search box. Click the Start orb or press the Windows key and type the name of the program you want to run or file you want to edit. Windows 7 does a good job at finding an exact match and press Enter to execute that program or open that file. If more than one match is found, use the up and down arrow keys to select the file you want to open and then press Enter.


Running as administrator: 

Some programs may require administrator mode to function properly. If you'd like, you can run any program as administrator from the search box. To do this, type the name of the program you want to run into the search box, but do not press Enter. Instead, press Ctrl+Shift+Enter. This shortcut runs the program as administrator. If you want to click and run a program as administrator hold down the Ctrl+Shift and then click the icon.
 

Take full advantage of the Taskbar


Pin programs to the Taskbar
 

All programs can be pinned to the Taskbar and allow easy access to your favorite programs without having to use the Start menu. To Pin a program to the Taskbar right-click on the program or shortcut to the program and in the menu choose the Pin to Taskbar option. Alternatively, you can also drag the icon to the Taskbar.
 

If you want to remove a pinned program, right-click on the Taskbar icon and click Unpin this program from the Taskbar. Alternatively, you can also drag the icon off of the Taskbar and then click Unpin this program from the Taskbar.

Move the icons and pinned programs


Any pinned or opened program on the Taskbar can be moved and arranged. Left-click on any icon on the Taskbar and drag it to the location you want it to remain.
 

Windows key and a number
 

Pressing the Windows key and a number on the top row of your keyboard open the window corresponding to the open program on your Taskbar. For example, in the picture below of the Windows 7 Taskbar, Firefox i the first icon, Control panel is the second icon, and Adobe Photoshop is the third icon. If the Windows key + 3 was pressed, Adobe Photoshop would become the active window. To make it even easier arrange your icons (as mentioned above) from left to right by most frequently opened.


Pin your favorite folder
 

If you frequently access the same folder (e.g., your favorites, my documents, Dropbox, etc.), pin the folder to the Windows Explorer icon on the Taskbar. To do this, drag your favorite folder to the Taskbar until you see Pin to Windows Explorer. Once pinned, right-click the Explorer icon to access that folder under the Pinned section.
 

Open a second instance
 

If you want to open a second instance or window of a program that is already open, press and hold the Shift key and then click the program icon on the Taskbar.
 

Get to the desktop
 

Click the Aero Peek button on the far right edge of the taskbar to get to the desktop.
 

Customize the Notification area

Windows Vista and Windows 7 allow the Windows Notification area (aka Systray) to be modified. By default, many of the icons shown in the past are now hidden and give Windows a much cleaner look. Customize this area to make icons show or not show by clicking on the up arrow next to the icons and selecting Customize, as shown in the picture. Once in Customize you can choose what programs show, don't show, or only show notifications.


Improve the quality of your text
 

Use the Windows ClearType Text Tuner to improve the overall quality of all text you read on your screen. To start the ClearType Text Tuner, click the Start Orb and type cttune.exe, then press Enter.
 

Enable and disable Windows 7 features
 

Turn on and off Windows features by clicking Start, typing features and press Enter. In the Programs and Features window on the left, click Turn Windows features on or off. Then, in the Windows Features box, check or uncheck the features you'd like to enable or disable.
 

Use the Reliability and Performance Monitor
 

View the reliability history of your computer by using the Reliability Monitor. Click the Start orb, type reliability, and press Enter to view the reliability history. 

In the Reliability Monitor, you'll be able to view the overall reliability of your computer and be able to identify any past problems your computer has had.
 

If you want to view the performance of your computer in real time, use the Performance Monitor. Click the Start orb, type performance, and press Enter for the Performance Monitor. In the Performance Monitor, you can view your computer's performance in real time or view a log of your systems performance.

Re-enable underlined keyboard shortcuts


By default, Windows 7 has the underlines for keyboard shortcuts like those shown in the picture. To re-enable these underlines in all Windows programs follow the steps below.


  1. Open the Control Panel.
  2. In the Control Panel, click Ease of Access.
  3. In Ease of Access, click Change how your keyboard works.
  4. Finally, check the Underline keyboard shortcuts and access keys and then click OK.

Rename multiple files at once


To change the name of multiple files at once, highlight all the files you want to rename in Windows Explorer and press the F2 key. Type in the new name you want to use for all files and press Enter. Once done, all files will be renamed to the name entered, followed by a unique number.


Install Windows Essentials


Install missing Windows software by installing the free Windows Essentials software package. Windows Essentials includes Windows Live Family Safety, Windows Live Mail, SkyDrive for Windows, Windows Movie Maker, Windows 
Photo Gallery, Windows Live Writer, and other programs.


Sunday 23 June 2019

Browser

Browser


Alternatively referred to as a web browser or Internet browser, a browser is a software program created as a simplified means to present and explore content on the World Wide Web. These pieces of content, including pictures, videos, and web pages, are connected using hyperlinks and classified with URIs (Uniform Resource Identifiers).
There have been many different web browsers that have come and gone over the years. The first, named WorldWideWeb (later changed to Nexus), was invented by Tim Berners-Lee in 1990. However, the first graphical browser and widely used browser that help bring popularity to the Internet was NCSA Mosaic.

List of current Internet browsers.

Where can I download a different browser?
What happens when you first open a browser?
What is needed for a browser to work?
Getting around in a browser.
Overview of browser bar buttons, menus, and functions.
What is my browser and other system information?


Related browser pages.
Internet browsers help and support.


List of current Internet browsers
Google Chrome
Microsoft Edge
Microsoft Internet Explorer
Mozilla Firefox
Opera
Apple Safari
Amazon Silk


Where can I download a different browser?
Note
The following links open in a new window. Once downloaded, you'll need to open your download folder and start the install for the browser to be installed on your computer.
Google Chrome - https://www.google.com/chrome
Mozilla Firefox - https://www.mozilla.com/firefox
Opera - https://www.opera.com
Apple Safari - https://www.apple.com/safari
Tip
As long as your computer supports the browser requirements, your computer can have more than one (or all) of the above browser installed and even running at the same time.
What happens when you first open a browser?
When you first open your Internet browser, it will load your homepage or show a start screen with your favorite pages. Once open, you can browse the Internet by following any of the hyperlinks or use a search engine to search for what you would like to find.
Note
If you changed your browser settings, it may also open the last opened web pages or all the tabs you had opened when it was last closed.
What things to do when bored on the Internet?
What is needed for a browser to work?
A browser needs a computer, smartphone, or tablet that meets the system requirements and that has a working Internet or intranet connection that allows it to connect to other computers.
Getting around in a browser
Each browser has a navigation toolbar that helps you find your way around the Internet. As seen in the images below, the navigation toolbar has undergone significant changes to streamline its appearance and functionality. However, the toolbar is likely never going to lose the navigation arrows and address bar.


Overview of browser bar buttons, menus, and functions
As we mentioned in the previous section, over time, many Internet browser buttons and options have either been moved or done away with completely. Consequently, some of the options mentioned below may not be immediately visible on your browser.
Tip
In certain browsers, pressing the Alt key on your keyboard shows hidden options.
Settings (menu)
Nearly all modern browsers today have moved advanced options and features in the upper-right or left corner of the browser window. Each browser's menu button is different:
For example, Internet Explorer uses , Chrome uses , Firefox uses , and Opera uses .
How to access Internet browser settings.
Back
The back button visits the previous page that referred you to the page you are currently viewing. This button often resembles an arrow pointing to the left.
Why does my Internet back button sometimes not work?
Creating an HTML back button.
Forward
The forward button moves you forward a page. It only works if you have previously used the back button. If you have not gone back, and your browser shows a forward button, it will be grayed out.
Stop
The stop button no longer exists in the majority of modern web browsers. However, its function (to stop a web page from loading) may still be executed by pressing the Esc key.
Refresh (reload)
As you browse the Internet the browser cache's data it downloads, meaning they store some or all parts of each page you visit on your computer. This feature is useful as it allows users to not have to download the full page each time they visit the same site. On some sites, you may want to refresh the page to get the latest version (e.g., on a news site). The Refresh button can also be used to reload a page that has failed to load because of an error.
Tip
Press the F5 key or Ctrl+R to refresh the page from the keyboard. If the F5 key is not working, you can also do a force reload by pressing Ctrl+F5 in Windows or on an Apple computer press command+R.
Home
The Home button is used to return users to their default web page; the same page that loads when the browser is first opened.
How to change my browser's homepage.


SearchIn the past, the Search button was used to open a user's default search page or execute a search on the text found in the address or URL text field. Today's browsers have what is called an omnibox, which is a search function built into the address bar.
 

FullscreenThis function is used to make the browser window a fullscreen; temporarily removing the toolbar, buttons, and address bar. Often, this view mode may be toggled on and off by pressing the F11 key on your keyboard.
 

HistoryThis feature allows users to view the pages that have been visited since the browser history was last cleared or created. All your saved pages are stored in your Internet cache.
 

How do I clear my Internet browser history?
 

Tip
The shortcut key for history for most browsers is Ctrl+H.
 

Favorites (bookmarks)This folder stores websites or pages chosen by the user. The term "Favorites" is used with Microsoft Internet Explorer; in other browsers this may be known as bookmarks or a hotlist.
 

How do I create an Internet favorite or bookmark? 
PrintThis feature, although no longer a button and may be accessed through the main settings menu or pressing Ctrl+P on the keyboard.
 

How to print a web page. 
Font (size)This button no longer exists but was used to increase or decrease the size of a font; an option now covered by the zoom feature.
 

ZoomOn modern browsers, holding down the Ctrl key and pressing either the "+" (plus key) or "-" (minus key) zooms in or out, increasing and decreasing the size of font and images. To reset the zoom function to its default size, press Ctrl+0 (zero) at the same time.
 

MailUsed to open a user's preferred e-mail program. Today, this option is no longer found in browsers.
 

EditUsed to open and edit the web page you are currently viewing in an HTML editor. Today, no longer found in browsers.
 

Related browser pagesHow do I clear my Internet browser history?
How to find version of installed Internet browser.
How to determine your browser, browser version, and installed browser plugins.
How do I update my browser?
Can I have more than one Internet browser installed?
How do I enable or disable JavaScript in my browser?
History of the Internet.
Internet browsers help and support.
ActiveX, Address bar, BHO, Bookmark, Browse, Cookie, Cross-browser, Internet, Internet terms, Konqueror, Lynx, Mosaic, Netscape, Omnibox, Plug-In, SeaMonkey, Tabbed browsing, Web, Web design terms

Graphics program

Graphics program

Alternatively referred to as a graphics editor, a graphics program is a software application that allows you to draw, edit, and manipulate an image or graphic file. A good example of a graphics program is CorelDRAW.

Excel Microsoft Office Excel spreadsheet Microsoft Excel

Excel

Code-named Odyssey, Excel is a software program from Microsoft that is part of the Microsoft Office suite of productivity software developed by Microsoft. Released on September 30, 1985, Excel is capable of creating and editing spreadsheets that are saved with a .xls or .xlsx file extension. General uses of Excel include cell-based calculation, pivot tables, and various graphing tools. For instance, with an Excel spreadsheet, you could create a monthly budget, track business expenses, or sort and organize large amounts of data.
Unlike a word processor, such as Microsoft Word, the Excel documents consist of columns and rows of data, made up of individual cells. Each of these cells can contain either text or numerical values that can be calculated using formulas.
 

  • Excel overview.
  • How can Excel be formatted?
  • Download an example of a spreadsheet file.
  • Why do people use Excel?
  • Why would someone use Excel over a different spreadsheet program?
  • Related Excel pages.
  • Microsoft Excel help and support.


Excel overview
Below is an example of Microsoft Excel with each of its major sections highlighted. See the formula bar, cell, column, row, or sheet tab links for further information about each of these sections.


How can Excel be formatted?
Each of the rows, columns, and cells can be modified in many ways, including the background color, number or date format, size, text font, layout, etc. In our above example, you can see that the first row (row 1) has a blue background, bold text, and each cell has its text centered. 


Download an example of a spreadsheet file

 
We've created a Microsoft Excel spreadsheet that can be downloaded and opened in any spreadsheet program including Microsoft Excel. This spreadsheet helps illustrate some of the capabilities of a spreadsheet, formulas, and functions used in a spreadsheet and allows you to experiment more with a spreadsheet.


Why do people use Excel?
There are many reasons people may use Excel (a spreadsheet program). For example, someone might use Excel to keep track of their expenses. For a full list of reason and examples of how people use a spreadsheet, see our spreadsheet definition.


Why would someone use Excel over a different spreadsheet program?
Today, there are many different free spreadsheet options that someon
e could use instead of Excel. However, even with the available free options, Excel remains the most used spreadsheet because of all its available options, features, and because many businesses still use the program.


Tip
Even with all Excel's options for most people a free spreadsheet program like Google Sheets is often all most users need.
Note
If you want to get Excel because it is a job requirement, it is still ok to learn all the basics in a free spreadsheet program. However, there are still many differences between Excel and a free spreadsheet program.


Related Pages
  • How to create a spreadsheet.
  • Where can I get a free spreadsheet program?
  • Microsoft Excel keyboard shortcuts.
  • How to add or remove a cell, column, or row in Excel.
  • How to hide rows or columns in Excel.
  • How to select an entire row or column in a spreadsheet.
  • How to create, delete, rename, and move a worksheet in Excel.
  • How to create, delete, and move files and folders in Google Drive.
  • Help, examples, and information on Excel formulas.
  • Microsoft Excel help and support.

Use the Windows Magnifier to zoom in on parts of your screen.

Use the Windows Magnifier to zoom in on parts of your screen.

The Windows Magnifier is a great accessibility tool that allows you to zoom into any portion of your screen you find hard to read. This feature can be found in the Control Panel in the Ease of Access Center. It can also be quickly accessed by holding down the Windows key and pressing the + (plus) key to zoom in or - (minus) key to zoom out. When enabled, the Magnifier box and the current magnification will be shown, as seen in the picture.


Zoom

Zoom may refer to any of the following:

1. When referring to an image or graphic, zoom describes the function of focusing on a section of an image and increasing its overall size to manipulate or view in greater detail. The image at right is zoomed in 1600% of its original size.
As can be seen in the image, as you zoom into an image each of the pixels that make up the image grow and make the image appear pixelated or jaggy. Unfortunately, unlike in the movies, you cannot "enhance" the image to make a zoomed image clearer.
Tip
Many graphics programs and Internet browsers support the keyboard shortcut key "Ctrl+minus key" to zoom out and "Ctrl+plus key" to zoom in on a picture or web page. Also, "Ctrl+0" (the number zero) will reset the zoom to the default zoom level.


Monday 4 February 2019

Pattern recognition

Pattern recognition
The ability of a computer software program to recognize aspects of an audio or visual data stream. One example of pattern recognition is OCR software, which finds the patterns of letters and numbers in an image and converts them to text.

Scanner

Scanner

A scanner may refer to any of the following:
 

1. When referring to hardware, a scanner or optical scanner is a hardware input device that optically "reads" and image and converts it into a digital signal. For example, a scanner may be used to convert a printed picture, drawing, or document (hard copy) into a digital file which can be edited on a computer. The picture shows an example of a flatbed scanner, the Epson V300.

  • How is a scanner connected?
  • Other types of computer scanners.
  • When was the first scanner created?
  • Why is a scanner an input device?

Related scanner pages.
Computer scanner help and support.


How is a scanner connected?


A scanner can be connected to a computer using many different interfaces although today is most commonly connected to a computer using a USB cable.

Firewire
Parallel
SCSI
USB


Other types of computer scanners
There are also other types of scanners that can be used with a computer.

Sheetfed scanner - scans paper by feeding it into the scanner
Handheld scanner - scans text and images by dragging the device over the page you want to scan
Card scanner - designed to scan business cards
Note: A handheld scanner should not be confused with a barcode reader.

When was the first scanner created?

The earliest forms of scanners appeared in the 1860s. However, the scanner as we know it today was created in 1957 by a man named Russell Kirsch at the United States National Bureau of Standards. The first image scanned by this device was a picture of Kirsch's son. This black and white image measured only 5x5 cm and had a resolution of 176 pixels on each side.

Why is a scanner an input device?

A computer scanner is a digitizer, which is a type of input device. It takes information from the real world (e.g., a document or picture) and converts it into digital information for a computer to store or manipulate. A scanner is only able to send information to the computer and cannot receive information from the computer like a printer (which is an output device).

Related scanner pages
Computer scanner manufacturers.
Computer scanner help and support.

 
2. When referring to software, a scanner may refer to any program that scans computer files for errors or other problems. A good example is an antivirus program, which scans the files on the computer for viruses or other malware.

Accessory, Photocopier, Picture, Scan, Scanner terms

Scanner terms

Scanner terms


Top Scanner Terms


Optical scanner
Image
Business card reader
OCR
Optical reader
TWAIN
Scan line


A
AAS

B
Business card reader

C
Card scanner


D
Digitize

E
Currently no listings

F
Flatbed scanner

G
Currently no listings

H
Handheld scanner


I
Image
ISIS

J
Currently no listings

K
Currently no listings

L
Currently no listings

M
Currently no listings

N
Currently no listings

O
OCR
Optical reader
Optical scanner

P
Currently no listings

Q
Currently no listings

R
Currently no listings

S
Scan head
Scan line
Scanner
Sheetfed scanner
Spatial digitizer

T
TET
Text Enhancement Technology
TWAIN

OCR

OCR

Short for optical character recognition or optical character reader, OCR is the process of taking an image of letters or typed text and converting it into data the computer understands. A good example is companies and libraries taking physical copies of books, magazines, or old printed material and using OCR to put them onto computers. While far from perfect, OCR is currently the best method of digitizing typed pages of text.

Methods of input
Data are generally passed to the computer by using a scanner or other hardware device, like a digital camera. Some computer fax applications use OCR to transform incoming faxes from graphics files into word processing documents.


Convert scanned images into text online

Convert scanned images into text online

Convert any scanned image into text using the free OCR online service Free OCR. The service supports any PDF, JPG, GIF, TIFF, or BMP file that is 2 MB or less in size. Once uploaded, the service will process the file and display the OCR results on the web page.

Speed up tabbed browsing with OneTab

Speed up tabbed browsing with OneTab

For those users who like to have many tabs open at the same time, they know that it can be very taxing on their RAM, thus slowing down their computer. However, there is a utility called OneTab that can reduce the RAM usage of these extra tabs by up to 95%. This app is a Google Chrome extension, but it works with Mozilla Firefox as well. OneTab can be downloaded from their website.

Auto sum shortcut key in Microsoft Excel

Auto sum shortcut key in Microsoft Excel

Quickly create a Microsoft Excel formula to get the sum of all cells by highlighting the cells you want to know the value of and pressing Alt and =(equals) together.

Use tab to autocomplete commands in the command line

Use tab to autocomplete commands in the command line

When at the MS-DOS, Windows command line or a Linux or Unix shell, typing in long file names or directories can become a burden. Use the Tab key to autocomplete the names of directories and files while in the command line. Below are a few examples of how this can be done.


MS-DOS and Windows command line users
While at the prompt, typing in one or more letters a file or directory name contains will autocomplete the name in alphabetical order. For example, when at the C:\> prompt, type the command below.

cd p

After the command above has been typed, instead of pressing the Enter key, press the Tab key. When you press the Tab key, the first directory that begins with "p" will be automatically typed into the command. Continuing to press the Tab key will cycle through all available directories, including the "Program Files" directory. This shortcut can be used any time you need to type a file name or directory in a command.

Tip: If you type one or more beginning letters for a file name or directory that does not exist in the current directory, the Tab key will not autocomplete.

Most Linux and Unix users
Depending on your variant of Linux or Unix and if you're remotely connecting to a Linux box, how the Tab key is used for autocomplete can change. However, below is a general run down on how this is commonly used in Linux. At the prompt in your home directory, type the command below.

cd p

Assuming your home directory has "public_ftp," "public_html," or another file or directory that begins with "p," you are shown all available files and directories. If you continue to type the next letter available, for example, "cd pu," the command will complete the remaining of the file name or directory up to the point there is no conflict. If you had both directories mentioned earlier in the current directory, it would autocomplete up to "public_" because there are two directories beginning with "public_". Pressing the Tab key again shows you the remaining available files beginning with "public_". If you wanted to type "public_html," add a "h" and press Tab to complete the directory name.

Application Software


Application software products are designed to satisfy a particular need of a particular environment. All software applications prepared in the computer lab can come under the category of Application software.

Application software may consist of a single program, such as Microsoft's notepad for writing and editing a simple text. It may also consist of a collection of programs, often called a software package, which work together to accomplish a task, such as a spreadsheet package.

Examples of Application software are the following −

Payroll Software
Student Record Software
Inventory Management Software
Income Tax Software
Railways Reservation Software
Microsoft Office Suite Software
Microsoft Word
Microsoft Excel
Microsoft PowerPoint

Features of application software are as follows −

Close to the user
Easy to design
More interactive
Slow in speed
Generally written in high-level language
Easy to understand
Easy to manipulate and use
Bigger in size and requires large storage space

When we type some letters or words, the computer translates them in numbers as computers can understand only numbers. A computer can understand the positional number system where there are only a few symbols called digits and these symbols represent different values depending on the position they occupy in the number.

The value of each digit in a number can be determined using −

The digit

The position of the digit in the number

The base of the number system (where the base is defined as the total number of digits available in the number system)

Decimal Number System
The number system that we use in our day-to-day life is the decimal number system. Decimal number system has base 10 as it uses 10 digits from 0 to 9. In decimal number system, the successive positions to the left of the decimal point represent units, tens, hundreds, thousands, and so on.

Each position represents a specific power of the base (10). For example, the decimal number 1234 consists of the digit 4 in the units position, 3 in the tens position, 2 in the hundreds position, and 1 in the thousands position. Its value can be written as

(1 x 1000)+ (2 x 100)+ (3 x 10)+ (4 x l)
(1 x 10³)+ (2 x 10²)+ (3 x 101)+ (4 x l00)
1000 + 200 + 30 + 4
1234
As a computer programmer or an IT professional, you should understand the following number systems which are frequently used in computers.

S.No.    Number System and Description
1   
Binary Number System

Base 2. Digits used : 0, 1

2   
Octal Number System

Base 8. Digits used : 0 to 7

3   
Hexa Decimal Number System

Base 16. Digits used: 0 to 9, Letters used : A- F

Binary Number System
Characteristics of the binary number system are as follows −

Uses two digits, 0 and 1

Also called as base 2 number system

Each position in a binary number represents a 0 power of the base (2). Example 20

Last position in a binary number represents a x power of the base (2). Example 2x where x represents the last position - 1.

Example
Binary Number: 101012

Calculating Decimal Equivalent −

Step    Binary Number    Decimal Number
Step 1    101012    ((1 x 24) + (0 x 23) + (1 x 22) + (0 x 21) + (1 x 20))10
Step 2    101012    (16 + 0 + 4 + 0 + 1)10
Step 3    101012    2110
Note − 101012 is normally written as 10101.

Octal Number System
Characteristics of the octal number system are as follows −

Uses eight digits, 0,1,2,3,4,5,6,7

Also called as base 8 number system

Each position in an octal number represents a 0 power of the base (8). Example 80

Last position in an octal number represents a x power of the base (8). Example 8x where x represents the last position - 1

Example
Octal Number: 125708

Calculating Decimal Equivalent −

Step    Octal Number    Decimal Number
Step 1    125708    ((1 x 84) + (2 x 83) + (5 x 82) + (7 x 81) + (0 x 80))10
Step 2    125708    (4096 + 1024 + 320 + 56 + 0)10
Step 3    125708    549610
Note − 125708 is normally written as 12570.

Hexadecimal Number System
Characteristics of hexadecimal number system are as follows −

Uses 10 digits and 6 letters, 0, 1, 2, 3, 4, 5, 6, 7, 8, 9, A, B, C, D, E, F

Letters represent the numbers starting from 10. A = 10. B = 11, C = 12, D = 13, E = 14, F = 15

Also called as base 16 number system

Each position in a hexadecimal number represents a 0 power of the base (16). Example, 160

Last position in a hexadecimal number represents a x power of the base (16). Example 16x where x represents the last position - 1

Example
Hexadecimal Number: 19FDE16

Calculating Decimal Equivalent −

Step    Binary Number    Decimal Number
Step 1    19FDE16    ((1 x 164) + (9 x 163) + (F x 162) + (D x 161) + (E x 160))10
Step 2    19FDE16    ((1 x 164) + (9 x 163) + (15 x 162) + (13 x 161) + (14 x 160))10
Step 3    19FDE16    (65536+ 36864 + 3840 + 208 + 14)10
Step 4    19FDE16    10646210
Note − 19FDE16 is normally written as 19FDE.

Sheet tab

Sheet tab

In Microsoft Excel, a sheet, sheet tab, or worksheet tab is used to display the worksheet that a user is currently editing. By clicking a worksheet tab (located at the bottom of the window), users may move between the various worksheets.

Every Excel file may have multiple worksheets, but the default number is three. These tabs are labeled "Sheet 1," "Sheet 2," and "Sheet 3." Users may add, move, and rename worksheets. Instructions on how to perform these operations are linked in the Related pages section below.

Tip: Use the shortcut key Alt+Shift+F1 to insert a new sheet while in Excel.

Cleaning the computer and its components

Cleaning the computer and its components
Cleaning your computer, components, and peripherals help keep everything in good working condition, helps prevent germs from spreading, and helps allow proper air flow. The picture shows a good example of just how dirty the inside of your computer case can get. Just looking at this picture it is immediately obvious that all the dust and dirt is going to prevent proper air flow and may even prevent the fan from working.
How often should I clean my computer?
General cleaning tips
Cleaning tools
Case cleaning
CD-ROM, DVD, and other disc drives
CD, DVD, and other discs cleaning
Fan cleaning
Hard drive cleaning
Headphones cleaning
Keyboard cleaning
Laptop cleaning
LCD/LED cleaning
CRT Monitor cleaning
Motherboard cleaning
Mouse cleaning
Printer cleaning
Scanner cleaning
Miscellaneous cleaning steps
How often should I clean my computer?
The frequency of how often you should clean your computer varies on different factors. To help you determine how often you need to clean your computer, we created the checklist below. Check each of the boxes below that apply to your computer's conditions to help determine how often you should clean the computer.
Where is the computer located?
In a home environment.    
In a clean office environment.    
In construction or industry environment.    
In school environment.    
Computer environment
Have cat or dog in the same building as computer.    
Smoke in the same building as computer.    
Smoke next to the computer.    
The computer is on the floor.    
The room with the computer has carpet.    
Eat or drink by computer.    
Who uses it?
Adult (18 and older).    
Young adults (ages 10-18) use computer.    
Pre-teen (younger than 10) use computer.    
More than one person uses computer.    
With what is checked above, clean your computer every 11 months.
General cleaning tips
Below is a listing of suggestions to follow when cleaning any computer components or peripherals as well as tips to help keep a computer clean.
Never spray or squirt any liquid onto any computer component. If a spray is needed, spray the liquid onto a cloth.
You can use a vacuum to suck up dirt, dust, or hair around the computer. However, do not use a vacuum inside your computer as it generates static electricity that can damage your computer. If you need to use a vacuum inside your computer, use a portable battery powered vacuum or try compressed air.
When cleaning a component or the computer, turn it off before cleaning.
Be cautious when using any cleaning solvents; some people have allergic reactions to chemicals in cleaning solvents, and some solvents can even damage the case. Try always to use water or a highly diluted solvent.
When cleaning, be careful to not accidentally adjust any knobs or controls. Also, when cleaning the back of the computer, if anything is connected make sure not to disconnect the plugs.
When cleaning fans, especially smaller fans, hold the fan or place something in-between the fan blades to prevent it from spinning. Spraying compressed air into a fan or cleaning a fan with a vacuum may cause damage or generate a back voltage.
Never eat or drink around the computer.
Limit smoking around the computer.
Cleaning tools
Although computer cleaning products are available, you can also use household items to clean your computer and its peripherals. Below is a listing of items you may need or want to use while cleaning your computer.
Cloth - A cotton cloth is the best tool used when rubbing down computer components. Paper towels can be used with most hardware, but we always recommend using a cloth whenever possible. However, only use a cloth when cleaning components such as the case, a drive, mouse, and keyboard. You should not use a cloth to clean any circuitry such as the RAM or motherboard.
Water or rubbing alcohol - When moistening a cloth, it is best to use water or rubbing alcohol. Other solvents may be bad for the plastics used with your computer.
Portable Vacuum - Sucking the dust, dirt, hair, cigarette particles, and other particles out of a computer can be one of the best methods of cleaning a computer. However, do not use a vacuum that plugs into the wall since it creates lots of static electricity that can damage your computer.
Cotton swabs - Cotton swaps moistened with rubbing alcohol or water are excellent tools for wiping hard to reach areas in your keyboard, mouse, and other locations.
Foam swabs - Whenever possible, it is better to use lint-free swabs such as foam swabs.
Tip: See our computer tools page for a list of other tools every technician should have.
Case cleaning
Why? Cleaning your case keeps the appearance of the computer looking new. While cleaning, if you see ventilation slots, these can be cleaned or cleared to help keep a steady airflow into the computer and keep all components cool.
Procedure: The plastic case that houses the PC components can be cleaned with a slightly damp lint-free cloth. For stubborn stains, add a little household detergent to the cloth. You should not use a solvent cleaner on plastics.
Make sure all vents and air holes are hair and lint-free by rubbing a cloth over the holes and vents. It is also helpful to take a vacuum around each of the hole, vents, and crevices on the computer. It is safe to use a standard vacuum when cleaning the outside vents of a computer.
If you are looking for steps on cleaning the inside of the computer, see the motherboard cleaning section.
CD-ROM, DVD, and other disc drive cleaning
Why? A dirty CD-ROM drive or other disc drives can cause read errors when reading discs. These read errors could cause software installation issues or issues while running the program.
Procedure: To clean the CD-ROM drive, we recommend purchasing a CD-ROM cleaner from your local computer retailer. Using a CD-ROM cleaner should sufficiently clean the CD-ROM laser from dust, dirt, and hair.
You can also use a cloth dampened with water to clean the tray that ejects from the drive. However, make sure that after the tray is cleaned that it completely dry before putting the tray back into the drive.
See the disc cleaning recommendation for further steps on cleaning each of your CDs.
Computer CD-ROM and disc drive help and support.
CD, DVD, and other discs cleaning
Why? Dirty CDs can cause read errors or cause CDs not to work at all.
Procedure: Use a cleaning kit or damp clean cotton cloth to clean CDs, DVDs, and other discs. When cleaning a disc wipe against the tracks, starting from the middle of the CD or DVD and wiping towards the outer side as shown in the picture below. Never wipe with the tracks; doing so may put more scratches on the disc.
Tip: If the substance on a CD cannot be removed using water, pure alcohol can also be used.
Hard drive cleaning
Why? Computer hard drives cannot be cleaned. However, they can be cleaned with software utilities to help it run fast and efficiently. Utilizing these utilities prevent the hard drive from slowing down.
Procedure: Refer to our basic troubleshooting section for your operating system for steps that can be done to help improve the performance of your computer.
How to clean a computer hard drive.
My computer is running slow what steps can I do to fix it?
Computer hard drive help and support.
Headphones cleaning
Why? Headphones and headsets can be used by many different people and may need to be frequently cleaned to help prevent the spreading of germs and head lice.
Procedure: If the headphones being used are plastic or vinyl, moisten a cloth with warm water and rub the head and earpieces of the headphones.
Note: If the headphones are being used for a library or school, do not use any disinfectant or cleaning solvent since some people can have allergic reactions to the chemicals they contain.
Headphones that have cushions also have the availability of having the cushions replaced. Replacing these cushions can also help keep the headphones clean.
Finally, in regards to headphones spreading head lice. If different students use the same headphones, have students use their own headphones, place bags over the headphones, or using headphones that can be wiped with warm water after each use.
Keyboard cleaning
These steps are for cleaning a desktop keyboard. See the cleaning a laptop keyboard page for laptop steps.
Dust, dirt, and bacteria
The computer keyboard is usually the most germ infected items in your home or office. A keyboard may even contain more bacteria than your toilet seat. Cleaning it helps remove any dangerous bacteria and keeps the keyboard working properly.
Procedure: Before cleaning the keyboard, first turn off the computer or if you are using a USB keyboard unplug it from the computer. Not unplugging the keyboard can cause other computer problems as you may press keys that cause the computer to perform a task you do not want it to perform.
Many people clean the keyboard by turning it upside down and shaking. A more efficient method is to use compressed air. Compressed air is pressurized air contained in a can with a very long nozzle. To clean a keyboard using compressed air aim between the keys and blow away all of the dust and debris that has gathered there. A vacuum cleaner can also be used, but make sure the keyboard does not have loose "pop off" keys can be sucked up by the vacuum.
If you want to clean the keyboard more extensively, remove the keys from the keyboard.
After the dust, dirt, and hair have been removed. Spray a disinfectant onto a cloth or use disinfectant cloths and rub each of the keys on the keyboard. As mentioned in our general cleaning tips, never spray any liquid onto the keyboard.
Substance spilled into the keyboard
If the keyboard has anything spilled on it (e.g., pop, cola, Pepsi, Coke, beer, wine, coffee, and milk), not taking the proper steps can destroy the keyboard.
Procedure: Below is recommendations that can help prevent a keyboard from becoming bad after something has spilled into the keys.
If anything is spilled onto the keyboard turn the computer off immediately or at the very least disconnect the keyboard from the computer. Once done flip the keyboard over to prevent the substance from penetrating circuits. While the keyboard is upside down, shake the keyboard over a surface that can be cleaned later. While still upside down, use a cloth to start cleaning the keys. After the keyboard has been cleaned, leave the keyboard upside down for at least two days allowing it to dry. Once dry, continue cleaning the keyboard with any remaining substance.
If after cleaning the keyboard keys are sticking, remove the keys and clean below the keys and the bottom portion of the key.
Finally, if the keyboard still works but remains dirty or sticky before discarding the keyboard as a last resort try washing the keyboard in the dishwasher.
If after doing all the above steps the keyboard still does not work, we recommend buying a new keyboard.
Computer keyboard help and support.
LCD/LED cleaning
Why? Dirt, dust, and fingerprints can cause the computer screen to be difficult to read.
Procedure: Unlike a CRT computer monitor, the LCD or LED monitor is not glass and requires special cleaning procedures.
When cleaning the LCD or LED screen, it is important to remember to not spray any liquids onto the screen directly. Press gently while cleaning and do not use a paper towel since it can scratch the screen.
To clean the LCD or LED screen, use a non-rugged microfiber cloth, soft cotton cloth, or Swiffer duster. If a dry cloth does not completely clean the screen, you can apply rubbing alcohol to the cloth and wipe the screen with a damp cloth. Rubbing alcohol is used to clean LCD and LED monitors before it leaves the factory.
Computer flat-panel and LCD help and support.
CRT monitor cleaning
Tip: This section is for CRT computer monitors. If you have a flat screen monitor, see the LCD/LED cleaning section.
Why? Dirt, dust, and fingerprints can cause the computer screen to be difficult to read.
Procedure: A glass monitor screen can be cleaned with ordinary household glass cleaner. Be sure to unplug the power cord from the monitor and spray the cleaner onto a lint-free cloth so the fluid does not leak into the electrical components inside the monitor. Vacuum off any dust that has settled on top of the monitor and make sure no books or papers are covering the air vents. Obstructed monitor vents can cause the monitor to overheat or even catch on fire.
Caution: We suggest only using a cloth dampened with water when cleaning non-glass monitors or any anti-glare screens. Using ordinary household glass cleaner on special screens, especially cleaners with ammonia, can remove anti-glare protection or other special surfaces.
Other good cleaning solutions
Microfiber Towels
Swiffer Dusters
Related pages
Computer monitor help and support.
Motherboard cleaning
Why? Dust and especially particles of cigarette smoke can build up and corrode circuitry, causing various problems such as computer lockups.
Caution: When inside the computer, take the necessary ESD precautions and try to avoid unplugging any cables or other connections.
Procedure: Our recommendation when cleaning the motherboard from dust, dirt, or hair is to use compressed air. When using compressed air, hold it in the upright position to prevent any of the chemicals from coming out of the container, which may damage or corrode the motherboard or other components. Also, ensure when using compressed air that you always blow the dust or dirt away from the motherboard or out of the case.
Another good alternative to compressed air is a portable battery powered vacuum. Portable vacuums can effectively remove the dust, dirt, and hair from the motherboard completely and prevent it from getting trapped in the case.
Warning: Never use an electrically powered vacuum, as it can cause lots of static electricity that can damage the computer. When using a vacuum, keep it a couple of inches away from the motherboard and other components to prevent damage and anything from being sucked into the vacuum (e.g., jumpers or small cables).
Tip: When cleaning the inside of the case, also look at any fans or heat sinks. Dust, dirt, and hair can collect around these components the most.
Computer motherboard help and support.
Computer mouse cleaning
Optical or laser mouse
Why? A dirty optical or laser mouse can cause the mouse cursor to be difficult to move or move erratically.
Procedure: Use a can of compressed air that is designed for use with electronic equipment, spraying around the optical sensor on the bottom of the mouse. Blowing air on the bottom of the mouse clears away any dirt, dust, hair, or other obstructions that may be blocking the optical sensor.
Avoid using any cleaning chemicals or wiping a cloth directly on the optical sensor, as it could scratch or damage the optical sensor.
Optical-mechanical (ball) mouse
Why? A dirty optical-mechanical mouse (mouse with a ball) can cause the mouse to be difficult to move, as well as cause strange mouse movement.
Procedure: To clean the rollers of an optical-mechanical mouse, you must first remove the bottom cover of the mouse. To do this, examine the bottom of the mouse to see what direction to rotate the cover. As you can see in the below illustration, the mouse cover must be moved counterclockwise. Place two fingers on the mouse cover, push down and rotate in the direction of the arrows.
Once the cover has rotated about an inch, rotate the mouse into its normal position, covering the bottom of the mouse with one hand. The bottom should then fall off, including the mouse ball. If the cover does not fall off, try shaking the mouse gently.
Once the bottom cover and the ball is removed, you should be able to see three rollers located inside the mouse. Use a cotton swab, finger, or fingernail to remove any substances on the rollers. Usually, there is a small line of hair and dirt in the middle of the roller. Remove as much of this substance as possible.
Once you have removed as much dirt and hair as possible, set the ball back in the mouse and place the cover back on.
If the mouse still has the same problems, repeat the above process. If after several attempts the mouse is still having the same problems, your mouse has other hardware issues and should be replaced.
Note: Cleaning your mouse pad with a damp cloth can also help improve a computer's mouse movement.
All types of mice
Why? To help keep the mouse clean and germ-free.
Procedure: Use a cloth moistened with rubbing alcohol or warm water and rub the surface of the mouse and each of its buttons.
Computer mouse help and support.
Printer cleaning
Why? Cleaning the outside of a printer can help keep the printer's appearance looking good and if used by many different people keep the printer clean of germs.
Procedure: First, make sure to turn off the printer before cleaning it. Dampen a cloth with water or rubbing alcohol and wipe the case and each of the buttons or knobs on the printer. As mentioned earlier, never spray any liquid directly onto the printer.
Why? Some printers require the inside to be cleaned to help keep the printer running smoothly.
Computer printer help and support.
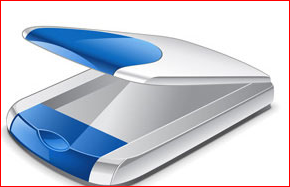
Computer scanner cleaning
Why? Flatbed scanners commonly become dirty with dust, fingerprints, and hair. When the scanner is dirty, the images may have distortions.
Procedure: Clean a flatbed scanner's surface by spraying a window cleaner onto a paper towel or cotton cloth and wipe the glass until clean. As mentioned earlier, never spray a liquid directly onto the component.
The same towel or cotton cloth can also be used to clean the outside of the scanner.
Computer scanner help and support.
Miscellaneous cleaning steps
Below is a listing of miscellaneous computer hardware that is rarely used today, but kept on this page people working on older computers and need to clean these devices.
Floppy drive cleaning
Why? Dirty read/write heads on the floppy drive can cause errors during the reading or writing process.
Procedures: The floppy drive is cleaned two different ways. The first method of cleaning a floppy drive is to purchase a kit at your local retail store designed to clean the read/write heads on your floppy drive.
The second method of cleaning the floppy drive is only recommended for experienced computer users. Open the floppy drive casing and physically swab the read/write heads with a lint-free foam swab soaked in pure alcohol or trichloroethane. When performing these steps, be extremely careful when cleaning the heads to ensure that you do not lock them out of alignment causing the floppy drive not to work. To help prevent the heads from becoming out of alignment, use a dabbing motion lightly putting the swab on the head and removing it, do not perform a side-to-side motion with the swab.
Computer floppy drive help and support.
Palm pilot cleaning
Why? Dirty touch screens can cause difficult navigation.
Procedure: To clean the PalmPilot screen, use a soft cloth moistened with rubbing alcohol and rub the screen and the casing of the palm pilot. It is not recommended to use glass cleaner as it could damage plastics over time.
SuperDisk and LS120 cleaning
Why? Cleaning the SuperDisk and LS120 prevents the drive heads from becoming dirty.
Procedure: Purchase the SuperDisk cleaning kit available through Imation. Using any other method voids the warranty on your drive.

Step-by-step guide to Android development with Eclipse

Step-by-step guide to Android development with Eclipse

Learn how to create applications in an Android development environment in this guide.
In this tutorial, you will learn to create a simple application of a game
As easy as it might seem, it requires some hard work on your part before you can create an app that runs without errors. If you are reading this tutorial, it means you are probably new to the Android app development field. Don't worry -- we will divide this tutorial into different parts to make it easy for you.
Set up the Android development environment
Setting up Android development environment takes some time at first. It helps to make sure you don’t do anything wrong to save yourself from the agony of doing the whole process again.

You're required to have Windows XP or later, or Mac OS X 10.5.8 or a later version to start Android application development process. Then, there are four tools that you will need and they are available on the Internet for free:

Java JDK5 or JDK6
Android SDK
Eclipse IDE for Java Developers (optional)
Android Development Tools (ADT) Eclipse Plugin (optional)
Step 1: Setup Java Development Kit (JDK)
You can download the JDK and install it, which is pretty easy. After that, you just have to set PATH and JAVA_HOME variables to the folder where you have java and javac.

Note for Windows Users: If you installed the JDK in C:\jdk1.6.0_15 then you will have to add the following two lines in your C:\autoexec.bat file.

set PATH=C:\jdk1.6.0_15\bin;%PATH%
set JAVA_HOME=C:\jdk1.6.0_15

Step 2: Configure Android SDK
After you have successfully installed the Android SDK, it is time to configure it. After installing the Android SDK, you will get a window like this:


Just de-select the Documentation for Android SDK and Samples for SDK packages if you want to reduce the installation size and time. Click on Install 7 packages to continue with the installation. You will get a dialogue box like this:


It will take some time to install, so in the meanwhile you could do some other task to kill the time. How long will it take? Well, it depends on the speed of your Internet connection. Once it is done, you can close the SDK manager.

Step 3: Setup Eclipse IDE
Install the latest version of Eclipse. After successful installation, it should display a window like this:


Step 4: Setup Android Development Tools (ADT) Plugin
Here you will learn to install the Android Development Tool plugin for Eclipse. To do this, you have to click on Help > Software Updates > Install New Software. This will display the following dialogue box.


Just click on the Add button as shown in the picture and add https://dl-ssl.google.com/android/eclipse/ as the location. When you press OK, Eclipse will start to search for the required plug-in and finally it will list the found plug-ins.


Step 5: Create Android Virtual Device
The last step is to create Android Virtual Device, which you will use to test your Android applications. To do this, open Eclipse and Launch Android AVD Manager from options Window > AVD Manager and click on New which will create a successful Android Virtual Device. Use the screenshot below to enter the correct values.

Voila! You have successfully created Android Application Development environment. You are now ready to create a simple Rock Paper Scissors Android App.

Before we write the code, you need to know how to take input from the user. The most efficient way of taking input from the user is to use the Scanner class, which is found in the java.io package as it is just a two-step process.


Calling the Java code in Eclipse
We will save you the trouble of writing the java code for a simple Rock Paper Scissors app and use can use the code below, but you are free to use your own code if you prefer.


// Android Rock Paper Scissors App
// Rock_Paper_Scissors
// *************

import java.util.Scanner;
import java.util.Random;


public class Rock
{
public static void main(String[] args)
{
    String personPlay; //User's play -- "R", "P", or "S"
    String computerPlay = ""; //Computer's play -- "R", "P", or "S"
    int computerInt; //Randomly generated number used to determine
                     //computer's play
    String response;


    Scanner scan = new Scanner(System.in);
    Random generator = new Random();

    System.out.println("Hey, let's play Rock, Paper, Scissors!\n" +
                       "Please enter a move.\n" + "Rock = R, Paper" +
                       "= P, and Scissors = S.");

    System.out.println();

    //Generate computer's play (0,1,2)
    computerInt = generator.nextInt(3)+1;

    //Translate computer's randomly generated play to
    //string using if //statements

    if (computerInt == 1)
       computerPlay = "R";
    else if (computerInt == 2)
       computerPlay = "P";
    else if (computerInt == 3)
       computerPlay = "S";


    //Get player's play from input-- note that this is
    // stored as a string
    System.out.println("Enter your play: ");
    personPlay = scan.next();

    //Make player's play uppercase for ease of comparison
    personPlay = personPlay.toUpperCase();

    //Print computer's play
    System.out.println("Computer play is: " + computerPlay);


    //See who won. Use nested ifs

    if (personPlay.equals(computerPlay))
       System.out.println("It's a tie!");
    else if (personPlay.equals("R"))
       if (computerPlay.equals("S"))
          System.out.println("Rock crushes scissors. You win!!");
    else if (computerPlay.equals("P"))
            System.out.println("Paper eats rock. You lose!!");
    else if (personPlay.equals("P"))
       if (computerPlay.equals("S"))
       System.out.println("Scissor cuts paper. You lose!!");
    else if (computerPlay.equals("R"))
            System.out.println("Paper eats rock. You win!!");
    else if (personPlay.equals("S"))
         if (computerPlay.equals("P"))
         System.out.println("Scissor cuts paper. You win!!");
    else if (computerPlay.equals("R"))
            System.out.println("Rock breaks scissors. You lose!!");
    else
         System.out.println("Invalid user input.");


Now calling the Java code in Eclipse is a tricky process and it helps to pay attention while you're doing this. Launch Eclipse and click File > New > Java Project


When the Create a Java Project box appears, it's time to give your project a name. Click on Finish to save it and it should appear in the Package Explorer window. Then we are supposed to add a package which will contain all our package files. Click on New Java Package icon to do this, as shown in the screenshot below.


Name your project and then click Finish.


Now we need to add a Java Class, which is as easy as adding a Java Package.


After giving it a name, make sure that the following options are checked:


After you create a new class, it will show up in the Work Space where you can write or copy the code.

Congratulations! You have just finished writing your first Java Application in Eclipse. It wasn’t that difficult was it?

Now you need to build the application and to do this, Right Click on your Android Project and select Android Tools->Export Signed Application Package. After selecting the export button, select Create new keystore and it will take you to the location where you want to save it, so give it a name and save it. Fill in all the required fields that are self-explanatory and save it. You have successfully exported the apk file to your computer and you can test the app it on your android device.

Testing
Testing is as important as developing the app because your app will be of no use if it doesn't run properly or shows errors. Luckily, there is an integrated testing framework in Android Framework, which you can use to test all the aspects of your application. SDK tools can also help set up and test applications. SDK will help you test different aspects of your app no matter if you are planning on running your tests within an emulator or any Android device.

I will recommend using ADT for the testing process, as it is comparatively easier than the other tools. Using ADT, you can easily create a test project and link it to the application under test. The great thing about the ADT is that it automatically adds the necessary <instrumentation> element in the test package's manifest file.

To create a test project in Eclipse with ADT
Launch Eclipse from the Start Menu and click on File > New > Other and from the drop-down menu, click on Android Test Project, then at the bottom of the dialog click Next. Enter any name you want and in the Test Target panel, set An Existing Android Project and browse to the Rock Paper Scissors app you made. Now you should be able to see the wizard completing the Test Target Package, Application Name, and Package Name fields for you.

Choose the Android SDK platform from the Build Target Panel that the application to be tested is using. Click the Finish button to complete the Wizard and if it is disabled, look for error messages at the top to fix any problems.

If you are looking for a step-by-step guide to Android testing, you will find this Activity Testing Tutorial very useful.

Good Morning Beautiful

Do you know????

Do you know????
/